This is an old revision of the document!
How to use the advanced search filters in the Lead Manager
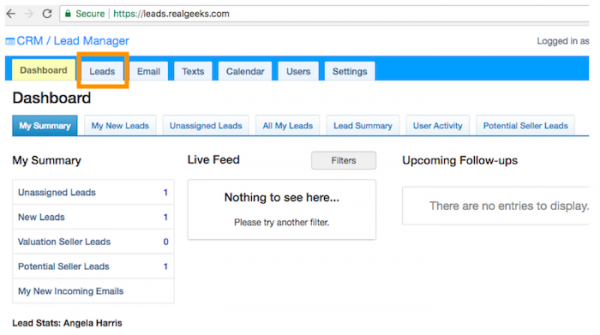
Navigate to your lead manager to get started. You'll see the site lead manager dashboard as seen below. Click the Leads tab.
To start creating your advanced search filter, click Advanced Search on the far right-hand side.
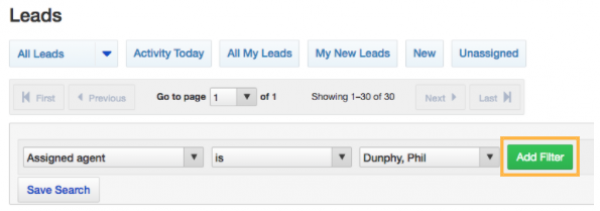
Clicking Advanced Search will open two drop down menus and fields in which to type information. You can select the type of information by which you would like to filter and then fill in corresponding information. You can see the drop down menu in the image below
For example, if you want to create a filter by assigned agent, select Assigned agent from the drop down menu, select is or, is not, in the second drop down menu, and then your agent of choice in the third drop down menu.
Once you’ve made your selections, click the green Add Filter button.
You’ll then see the lead manager provide a confirmation message that your filter was successfully added.
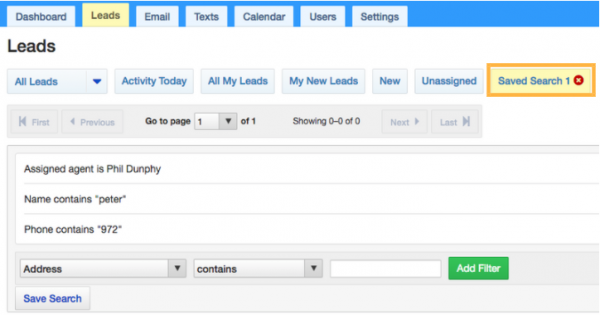
Repeat the previous steps to continue to add more filters until your advanced search includes everything you want. You can see an example of an advanced search with multiple filters below.
After your advanced search has all of the filters you want to save, click the Save Search button.
A Search Name box will pop up. Type in the name you want to title this specific advanced search with the appropriate filters. Click OK.
The search will save with the name you typed. You will see a green confirmation appear stating your search was saved. You’ll also see the saved search on your dashboard for easy access in the future. You can also click the red X button to delete the saved search if you want to remove it at any time.
Congratulations! You’ve successfully created and saved a lead manager filter.


